The simple way to do this is to lift the car onto 4-floor stands - not jacks, then once you have it "suspended" - this can be a one man job, but with a catch.
You'll need to have a makeshift rod and some 3/16" or 1/4" clear plastic tubing. The rod is so you can use it to keep the pedal pressed down - because once the "bleeder" is open, all the pressure shoots out thru that open hole that little bleeder becomes. This fills that tubes' open line with fluid to displace the air in it, this buys you some "Return distance" if the pedal should need to have some give so you can brace your rod from the Seat to the Pedal and hold it down and not all the air has purged the line.
The plastic tubing is sized to fit over the opening of the Brakes bleeder screw - if you don't know what one looks like, you really shouldn't be doing this - get some knowledgeable help for this...
Because...
For a Ford Fiesta - the ABS system is PASSIVE - means that it's fluid can pass thru the module and has solenoids that engage in a rapid fashion to pump the fluid in the line - vibrate it - very fast when the system detects the wheels are slipping on ice or snow or slicked up roads.
The disdplacement the solenoid pluger does into the fluid in the brake line, causes a pressure-wave to build, forcing fluid pressure to rise rapidly. It's why you feel the vibration in the pedal, the system artificially injects extra power thru displacement the plunger does, into the system to make the wheels stop, then released - wheels can turn - then it reapplies - all looking at the ABS sensors to tell is it can stop doing this rapid pulsation to the fluid when normal braking can be sensed as occurring - as when the wheels rotate when the brakes are applied.
When you skid, the wheels speed sensors see that - and the controller thinks you're not having any traction so the ABS system then engages the pulsing solenoids until it can determine the skidding has stopped.
So the system uses the solenoids to displace fluid in the line generating extra pressure and a moment later- release it quickly to drop pressure and bring the system down to no pressure (a coast type of function). So the wheel stops turning, then when that sensor sees it's not turning - tells the system to release the fluid pressure to let the wheel gain momentum again (continue to roll) - so it's an inertia / momentum / inertia - actions using the spin to take up energy from the rolling motion and then stop the roll, then let the roll occur again, to let the system drain away speed.
It's why they used to tell you - if you don't have ABS, you'll have to pump the brakes to try and keep control and reduce the skid.
Nowadays, with ABS, you just keep your foot on the brake.
This pulsing process also lets you maintain some control over the direction of the skid by letting the tires try to find traction and start rolling in a direction you turn the steering wheel towards - its so you can use the ABS as a form of skid control to let the tires have some stopping power and some steering and friction to let you come to a stop - although it takes longer and you will travel a farther distance - but not bad as a complete lockup and loos of control without ABS.
The Master Cylinder doesn't have a ton of fluid in it, and the piston doesn't push a lot of fluid in the first place - but you can also use this time with the system to look at and determine if the brake fluid can go into the pistons chamber quickly enough.
Why?
Look carefully and although not actual - the above is a BASIC
system and if you are not careful - any adjustments or replacements of hardware
can affect the "throw" of the pedal and pushrod - which can result in loss of pressure
and a very bad crash.
So this allows a lot of throw to push a small amount of fluid.
- This is also why I have taken issues with DOT5 fluids.
- Not all are thermally stable - they may not cause FADE when hot, but if they are cold - they have, or exhibit, a VISCOSITY trait (thicker fluid flow when cold) which can slow down the responsiveness you may need - including a "starvation" or cavitation event causing the system to grab (suck in) anything it can to replace the displaced fluid - including contaminates you don't normally think is possible to get in there. (Seals - tube line inner linings - dirt - metal shavings) even set off the Brake Adjuster into thinking it's time to set the brake shoes a little closer - causing a grabbing event you don't want in a skid.
- DOT3 - as a reminder - Is not compatible with the seals used in DOT5 systems - so if you can avoid it - don't mix! NEVER! use only the type of fluid your have stated on the top cover of that brake fluid cap.
Use small diameter tubing - its' internal volume is small - so it can take up the fluid and fill quickly to displace the air in the tube you don't want to get back into the system..
Got a Pill Bottle? Ones that are empty from Grammas is preferred - because that becomes your new friend to take on the 1-quart or 2-quart bottle.
- The bigger pill bottles are great, but are heavy, cumbersome and take up room in places you need just a short line to the bleeder nipple - so keep it manageable.
- Drill a hole just undersize of the OD of the tubing into the bottle's cap
- - so it can act as a gasket and friction can hold the tube in the bottle
- The bottle itself should be short squat size so you can put in the tubing line and its end is flush to the bottom of the bottle
- The Line itself should only extend 4" out of the bottle so you can put the bottle close to the caliper or outside of the rear brakes inner cover and even use the coil spring to hold the bottle up and you can simply duct-tape or zip-tie the bottle to the coil of the spring to hold it steady
I use 1/8" - 3/16" ID tubing - it's a tight fit but offers no air leak if its' done right And you will need to clean off the nipple inner hole and outside - they usually come with a cover grommet - so it can save you some cleaning time - if it's still there.
When you open your FRESH bottle of Brake Fluid for this - your line to the nipple of each wheels' brake will need to be cleaned or rinsed - so pour off some into a small single serve cup (Pizza Hut Dipping -
Clean And Empty of course! or Similar works) so you can rinse the line out to help keep dirt out of the system.
- I recommend that you "wet" the end of the tube line with fluid - dip it unto that cup - so the seal to the nipple has fluid surrounding the seal, inside the line to make the air less likely to reenter - Do the same around the Nipple to help the threads keep out air and the dirt. A drop works.
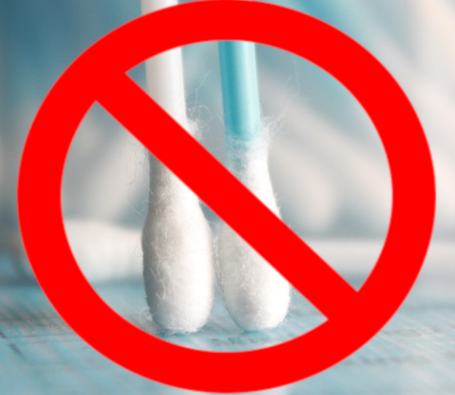
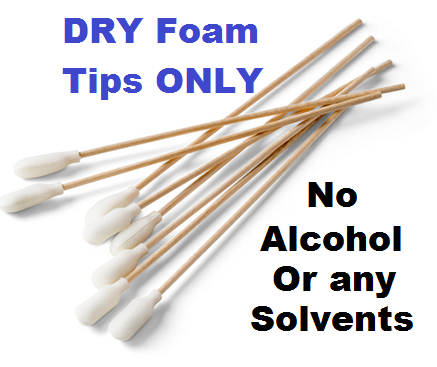
- I do not recommend Q-tips - the fuzz end will leave strands - try a foam tip instead.
Check and find a nice Box end wrench that is easy for you to loosen turn and retighten the nipple without too much fuss. The reason is so the when you tighten - and you find you're running out of turn room, the tubing - if thin walled enough, won't interfere with your ability to lift off the wrench to reset to another turn to tighten the nipple so when you release the pedal - the air doesn't get sucked back into the system..
Ok, That rod? Got a Window Squeegee you stole from the Gas Station years ago? The one you forgot to return to its holster at the pump? Ok, no? How about an old broom handle - something so you can set your rod onto the pedal? So - that once the brake pedal is depressed down to the floor - you can then place the "dowel" on the pad, and adjust the seat so you can then move and lock in place, the seat holding the dowel forward to "hold" that rod while you run back and close off that nipple.
The process in pretty simple.
Set up seat and broom handle cut to length - your test jig to replace your hand pressing down the brake pedal so you can get to the brake you're bleeding to reset the nipple for seal.
Clean the work areas around each brake nipple.
Starting at Right Rear wheel - of if you are a right side driver (European) Left side - either way, start at the farthest line to that brake wheel.
- Install or check fit of bottle and it's line so you can leave the bottle there while you press the brake pedal down to bleed this wheel.
- Put on the Box wrench on to the nipple's flanges...socket
- Wet hose end with Brake fluid (to help with Seal) and Install line on the nipple.
- Break Nipples' seal - turn wrench to loosen the nipple - loosen a 1/2 to 1 full turn - you should see fluid begin to flow - if not - don't worry - go up front and see if the pedal GOES DOWN EASY - VERY EASY - that means you now have your leak and bleeding is underway.
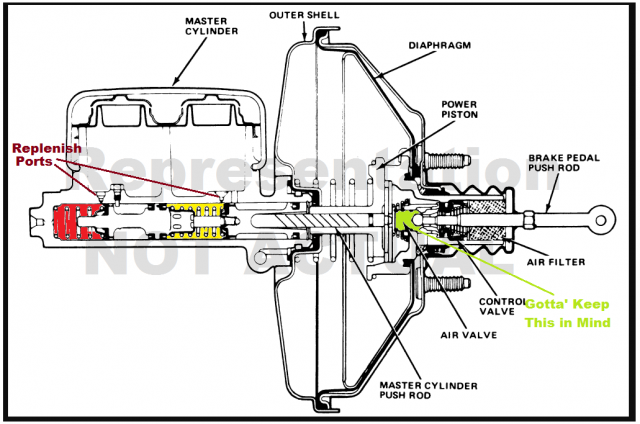
- Important! Keep in mind using the explanation and graphic above. The Green Space is your Push Rod Clearance. Red Section and AMBER Sections move to pressurize their chambers. When you Release the Brake Pedal Fluid should drain from the larger chambers into the smaller one quite easily - IF IT DOES NOT - YOU MAY HAVE A PROBLEM WITH PUSHROD CLEARANCE - The PUSH ROD may not be letting the chambers retract back far enough to open the REPLENISH PORTS so the Brake Fluid can refill that smaller pressure chamber.
- This is not rocket science but if you have pushrod to booster issues ,where the pedal to back stop clearances are unable to let the pedal retract fully - the Replenish ports cannot refill the chambers as fast or as quickly enough to restore braking effectiveness - the pedal can travel to the bottom and you cannot recover braking - this may be the cause of your "dead pedals"
- you'll need to install your broom handle jig using the seat to keep the pedal down until you can get back there and close off the nipple.
- Close your wheel nipple.
- Inspect the fluid in the line - Dirty? Go to the front master cylinder - look at it's color and determine if it's clean - if darker or rusty - Keep doing this - just repeat the above starting at the Break the Nipples' Seal - keeping an eye on fluid level back at the Brakes master Cylinder reservoir.
- Don't let the pedal rise too far or you might have to do this all over again.
Keep an eye on your Pill Bottle fluid level too - empty as needed to remove the old, and let the system bleed down into it until you have clear fluid emptying into the bottle.
When that wheel is complete
Start the car - get the brakes vacuum booster recharged then shut off the engine.
Using a box end wrench - make sure that you CLOSE your Bleeder nipple so you don't have air and dirt going back into the system - especially when you need to know if the replenishing is normal or not - does it take a longer time?.
Once the Nipple is tightly closed, you can remove the rod and let the pedal rise.
Remember when I said to do this on Jack Stands? This things gott 'a vacuum booster - each wheel, when done, you can start the car and let the brake booster recover it's vacuum - just remember to keep the site you're doing this at well ventilated. This also helps you in resetting and pressing the pedal down.
Might have to cut off even a board furring strip to the right length so you can manage the bleeding safely and easily - we're not trying to make this hard, just when you're friends are too lazy to help - well, you might as well be the Hero of the day...it does take effort.
This is a repetitive step - and you're taking fluid out of the front and into that bottle - never to be used again. So the FRESH stuff goes in to the front - watching your level rise as you pour refill and don't overfill.
Each time you do this for that side - keep an eye on the pill bottle level too - so when it's getting full - STOP and close the nipple and empty the bottle - an old milk jug works - for recycling too.
Again, keep it Manageable.
Now when you do this; are you keeping track of how much the fluid is going down? Each line should be that same amount - every time. So as you go thru the process - longest lines to the shorter lines until you at the booster side brake caliper - each one will still take in, or use, a set amount of fluid.
Did you find the pedal went down fast, but once you got to one wheel, when that line was released - it went down really fast? This may indicate the blockage was in the line you're currently on - double check your work! You - might need to spend more time and use more fluid to ensure the blockage and obstructions are flushed out from here - so it may mean you have to undo the nipple a 1/2 turn more than the others - and even then, if it's a big chunk - might require a complete removal of the nipple fitting to provide enough room to "pop" out the debris. Shavings and failed rubber seals are two possibilities in this scenario.