
- Messages
- 175
- Likes
- 151
- City
- Not-US
- State
- Non-US
- Country
- Canada
- What I Drive
- 2011 Fiesta SE
Welcome to JP's Advanced Tech to Wax Application ala DA polisher.
Advanced Tech is the progression from my original detailing threads. Here I will dive into some work that requires knowledge and understanding from some of my General Tech threads found here...
JP's GT Introduction to Detailing 101
JP's GT How to properly wash your car
JP's GT Waxes & Sealants
...I encourage you to peruse these threads before moving on to more advanced detailing techniques.
There are a few different types of polisher units available, Polishers come in Rotary, Dual Action and Forced Rotation Dual Action. I will be concentrating on the Dual Action type.
Larry from AMMO NYC shows the differences on polisher types (@ 5m35s)...
AMMO Training Academy - Intermediate Series 200
In my process the system follows a set time schedule and I usually complete it over a day & a half.
From start to finish total working time is about 24 hours including curing, but I take my time, drink beers and play loud music. I will group a number of processes together under this heading as they are all part of the same artwork in the end. From washing to drying, surface prep and application & removal.
Now lets get started...
Just a little refresh to get us to the good parts. Start with removing anything that will interfere with applying a coating over the whole car such as license plates and/or bracket, antenna or rear wiper arm. Follow with a thorough washing of the car. I personally like to wash the vehicle twice before a wax application. The first wash I will go over the car with a deep thorough cleaning covering all aspects, including the interior, wheels, wheel wells, doors & jambs etc. Now is the time to hit up a engine bay cleaning even before the car wash. I will perform this cleaning a few days to a week before hand. This also gives me the chance to look over the car for items I might need to address before applying a coating of wax.
The second wash I will perform the evening before I plan to wax. Again I thoroughly wash the exterior of the car, wheels, wheel wells, doors & jambs etc. adding cleaning of the areas where the fenders and front bumper fold under the hood and the trunk/hatch jambs. By cleaning those seams you reduce the possibility of product contamination from dirt and abrasive materials being drawn out in process.
During the second wash using a stripper wash (*giggles*) in conjunction with your regular soap can reduce the workload of decontaminating the paint surface. These products help to remove old wax coatings, insect remnants, sap, oils and greases.
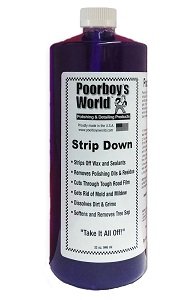
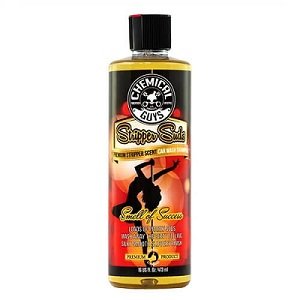
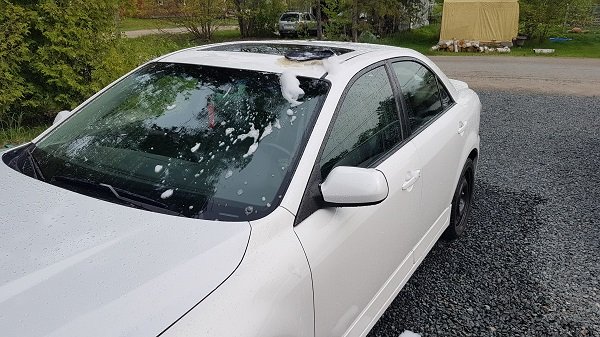
I personally use the Poorboy's Strip Down with great success.Now that the car is clean, If you washed outdoors, move the car into a clean workspace where it will stay till completion.
Dry the car using clean MF towels. The more water you remove the less water you will fight with while prepping and waxing later. Compressed air car help blow water out from seams around lights, handles and trim etc. Now that the car is dried, revisit the car periodically and wipe up any water that dribbles out of seams and trim etc. The key here is to remove the formation of water spots/trails as the car naturally sheds water from areas you cant reach into. I now will leave the car overnight with the shop heat on if necessary to help dry up.
Now the fun begins...
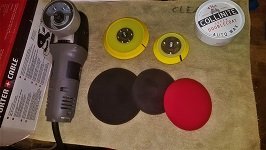
First off is pull out the tools. Have a large clean space to set up on. You will need to be able to drop and pickup multiple items often without contamination.

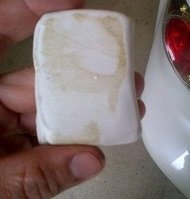
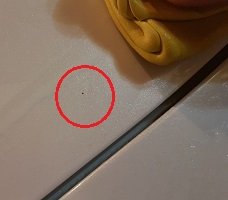
In building a canvas for your wax you need to promote good adhesion by providing a perfectly clean contaminant free surface. Anything under the surface of the wax will reduce the lifespan of the product. One way to clean the surface is with a clay treatment. If you have never clayed your car before, I would suggest working over the whole car. Regular clay treatments are not required once the surface is clean and protected. If you have clayed, or the paint is reasonably clean, just spot work might be necessary.

Clay will remove hardened tree sap, road grime, rail dust (small embedded metals from brake dust) and insect remnants.
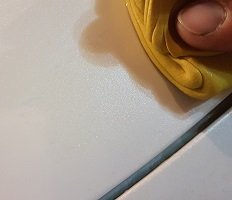
Once clay has been completed, the paint should be soft & smooth. Running your forearm across the surface will reveal how nice and clean that canvas is...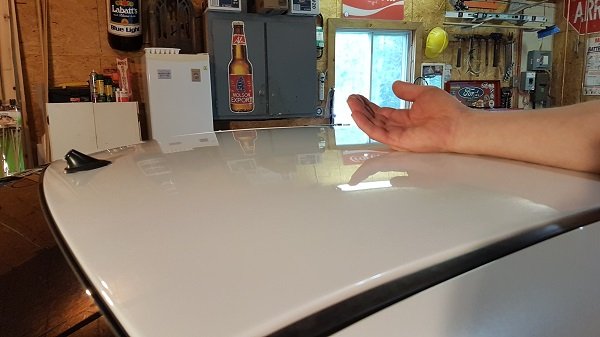
If you can still feel a rough surface or friction this is a sign you may have considerable oxidization on the paint. This commonly requires compound or polishing the surface. Clay can only remove so much, if compound is required, that will need to be addressed to ensure the wax can adhere properly. (Paint correction thread to come eventually)
Wax ON!...
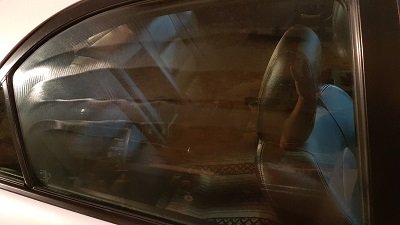
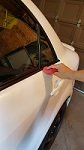
Car is clean?...check. Surface is prepped?...check. Normally you would bust out your applicator & wax and go to town applying to the car most commonly in small swirls, or possibly back in forth in a North/South then East/West pattern. These processes are used to hopefully apply the product in a uniform manner across the panel. For example...
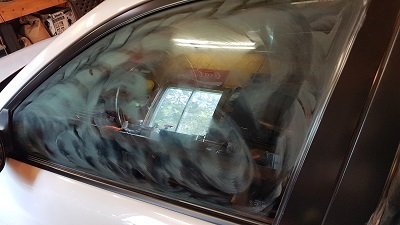
There is nothing wrong with a hand job, and you will need to do that for certain locations where the DA isnt feasible. What a polisher can help you do when waxing is apply your products thinner and consistently across the panel. You will find it easier to control the pressure on the applicator and concentrate on what the unit is doing. I also find I am able to work larger sections compared to doing it by hand. When you get your technique perfected, you will be able to lay down layers of product evenly which will lead to even flash off/hazing and therefore a better quality coating. For example...
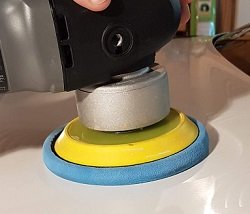
The first step to DA polishing success is to ensure you mark the backing plate. This gives a means by which the rotational speed of the pad can be monitored...remember from Detailing 101 thread?
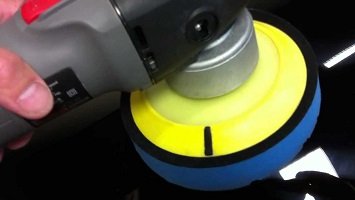
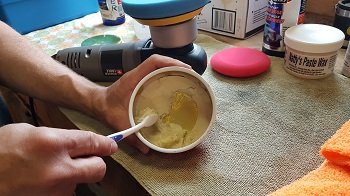
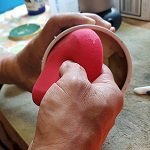
DA backing plates and pads are fitted with Hook & Loop. Apply your pad centered on the backing plate. From this point forward always place your polisher with the pad facing up to keep from contaminating the pad. Start with priming your pad with product. I usually begin with a small mist of water from a spray bottle just to dampen the pad. Then apply product and work it into the pad.
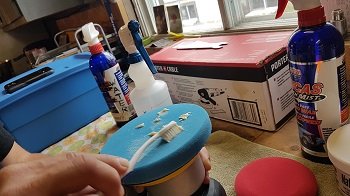
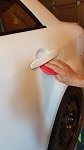
Once you have sufficiently primed the pad, choose your location to start application. With the polisher off begin by "kissing" the paint across the area you are working. Dab the pad on the panel to leave prints of product to collect as you work the area. This will ensure you dont have more product where you started compared to where you finish this round.
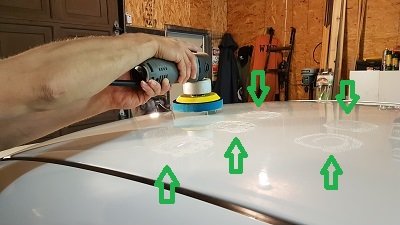
Work in areas of 2' square until you get the hang of operating a polisher. Try to get comfortable with the unit, you will be working together for quite a while. Always place the pad on the working area and ensure a slow speed setting before turning the unit on. Once you turn on the unit you can the monitor the pad rotation and adjust speed to optimize. Here are your 4 main points to concentrate on while applying...
1. Keep the pad level with the surface at all times. If the body contour changes, so does your pad maintaining flat contact always.
2. Only apply enough pressure to slightly indent the backing of the pad.
3. Maintain a slow rotation of the pad approximately 1/sec. Adjust polisher speed to dial in rotation.
4. Work in a North/South pattern then switch to an East/West pattern. Always overlap your last pass by 50%.
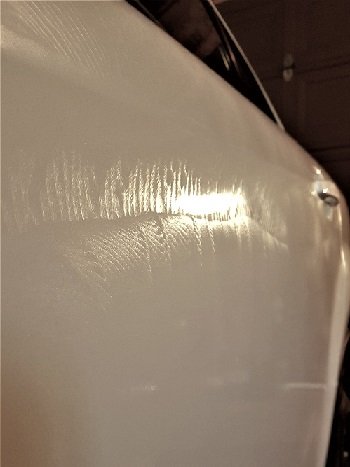
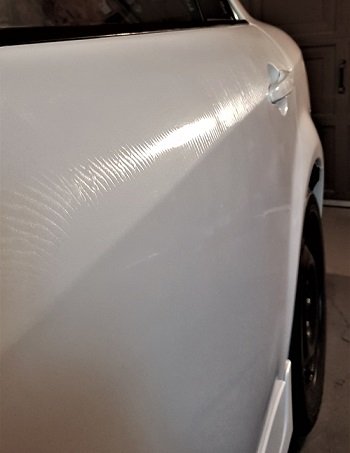
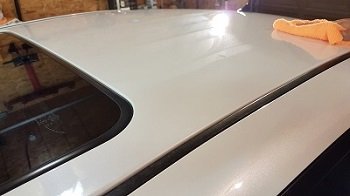
Once you have applied, you should have a nice pattern of close rotational marks even spaced like bones in a fish.
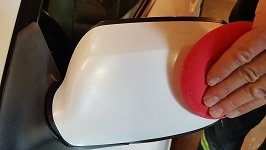
Use a foam pad hand applicator to reach into tight spaces, apply to smaller work areas or finish corners and edges of the panel you are DA applying.
Wax OFF!...
Depending on the product used the flash off time will vary. The product will become hazy as the petro-solvents evaporate. To see if the product is ready to be removed use your index finder and place a small swipe in the wax. If the swipe appears greasy, wait. If the swipe appears clean, time to remove.

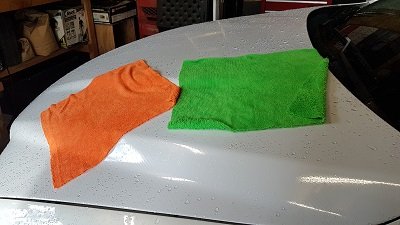
Taking a clean good condition MF towel folded with the pile side out, begin removing the wax by using circular motions. Do not apply pressure, the idea is to have applied a very thin layer making removal easier. This will reduce the possibility of micro-marring your paint finish over time. Resist the urge to use more pressure and in stead use more passes if you have a difficult time removing wax.
The conclusion
Using a polisher is an exercise in consistency. Maintaining pad angle and pressure plus the mechanics of pad rotation and movement speeds will help perfect your protection game. With these points maximized coupled with surface prep, your wax will look and perform better.
The following is an list of additional points regarding waxing with a DA polisher.
Thank you,
JP
edited for updates
Advanced Tech is the progression from my original detailing threads. Here I will dive into some work that requires knowledge and understanding from some of my General Tech threads found here...
JP's GT Introduction to Detailing 101
JP's GT How to properly wash your car
JP's GT Waxes & Sealants
...I encourage you to peruse these threads before moving on to more advanced detailing techniques.
There are a few different types of polisher units available, Polishers come in Rotary, Dual Action and Forced Rotation Dual Action. I will be concentrating on the Dual Action type.
Larry from AMMO NYC shows the differences on polisher types (@ 5m35s)...
AMMO Training Academy - Intermediate Series 200
In my process the system follows a set time schedule and I usually complete it over a day & a half.
From start to finish total working time is about 24 hours including curing, but I take my time, drink beers and play loud music. I will group a number of processes together under this heading as they are all part of the same artwork in the end. From washing to drying, surface prep and application & removal.
Now lets get started...
Just a little refresh to get us to the good parts. Start with removing anything that will interfere with applying a coating over the whole car such as license plates and/or bracket, antenna or rear wiper arm. Follow with a thorough washing of the car. I personally like to wash the vehicle twice before a wax application. The first wash I will go over the car with a deep thorough cleaning covering all aspects, including the interior, wheels, wheel wells, doors & jambs etc. Now is the time to hit up a engine bay cleaning even before the car wash. I will perform this cleaning a few days to a week before hand. This also gives me the chance to look over the car for items I might need to address before applying a coating of wax.
The second wash I will perform the evening before I plan to wax. Again I thoroughly wash the exterior of the car, wheels, wheel wells, doors & jambs etc. adding cleaning of the areas where the fenders and front bumper fold under the hood and the trunk/hatch jambs. By cleaning those seams you reduce the possibility of product contamination from dirt and abrasive materials being drawn out in process.
During the second wash using a stripper wash (*giggles*) in conjunction with your regular soap can reduce the workload of decontaminating the paint surface. These products help to remove old wax coatings, insect remnants, sap, oils and greases.
I personally use the Poorboy's Strip Down with great success.Now that the car is clean, If you washed outdoors, move the car into a clean workspace where it will stay till completion.
Dry the car using clean MF towels. The more water you remove the less water you will fight with while prepping and waxing later. Compressed air car help blow water out from seams around lights, handles and trim etc. Now that the car is dried, revisit the car periodically and wipe up any water that dribbles out of seams and trim etc. The key here is to remove the formation of water spots/trails as the car naturally sheds water from areas you cant reach into. I now will leave the car overnight with the shop heat on if necessary to help dry up.
Now the fun begins...
First off is pull out the tools. Have a large clean space to set up on. You will need to be able to drop and pickup multiple items often without contamination.
In building a canvas for your wax you need to promote good adhesion by providing a perfectly clean contaminant free surface. Anything under the surface of the wax will reduce the lifespan of the product. One way to clean the surface is with a clay treatment. If you have never clayed your car before, I would suggest working over the whole car. Regular clay treatments are not required once the surface is clean and protected. If you have clayed, or the paint is reasonably clean, just spot work might be necessary.
Clay will remove hardened tree sap, road grime, rail dust (small embedded metals from brake dust) and insect remnants.
Once clay has been completed, the paint should be soft & smooth. Running your forearm across the surface will reveal how nice and clean that canvas is...
If you can still feel a rough surface or friction this is a sign you may have considerable oxidization on the paint. This commonly requires compound or polishing the surface. Clay can only remove so much, if compound is required, that will need to be addressed to ensure the wax can adhere properly. (Paint correction thread to come eventually)
Wax ON!...
Car is clean?...check. Surface is prepped?...check. Normally you would bust out your applicator & wax and go to town applying to the car most commonly in small swirls, or possibly back in forth in a North/South then East/West pattern. These processes are used to hopefully apply the product in a uniform manner across the panel. For example...
There is nothing wrong with a hand job, and you will need to do that for certain locations where the DA isnt feasible. What a polisher can help you do when waxing is apply your products thinner and consistently across the panel. You will find it easier to control the pressure on the applicator and concentrate on what the unit is doing. I also find I am able to work larger sections compared to doing it by hand. When you get your technique perfected, you will be able to lay down layers of product evenly which will lead to even flash off/hazing and therefore a better quality coating. For example...
The first step to DA polishing success is to ensure you mark the backing plate. This gives a means by which the rotational speed of the pad can be monitored...remember from Detailing 101 thread?
DA backing plates and pads are fitted with Hook & Loop. Apply your pad centered on the backing plate. From this point forward always place your polisher with the pad facing up to keep from contaminating the pad. Start with priming your pad with product. I usually begin with a small mist of water from a spray bottle just to dampen the pad. Then apply product and work it into the pad.
Once you have sufficiently primed the pad, choose your location to start application. With the polisher off begin by "kissing" the paint across the area you are working. Dab the pad on the panel to leave prints of product to collect as you work the area. This will ensure you dont have more product where you started compared to where you finish this round.
Work in areas of 2' square until you get the hang of operating a polisher. Try to get comfortable with the unit, you will be working together for quite a while. Always place the pad on the working area and ensure a slow speed setting before turning the unit on. Once you turn on the unit you can the monitor the pad rotation and adjust speed to optimize. Here are your 4 main points to concentrate on while applying...
1. Keep the pad level with the surface at all times. If the body contour changes, so does your pad maintaining flat contact always.
2. Only apply enough pressure to slightly indent the backing of the pad.
3. Maintain a slow rotation of the pad approximately 1/sec. Adjust polisher speed to dial in rotation.
4. Work in a North/South pattern then switch to an East/West pattern. Always overlap your last pass by 50%.
Once you have applied, you should have a nice pattern of close rotational marks even spaced like bones in a fish.
Use a foam pad hand applicator to reach into tight spaces, apply to smaller work areas or finish corners and edges of the panel you are DA applying.
Wax OFF!...
Depending on the product used the flash off time will vary. The product will become hazy as the petro-solvents evaporate. To see if the product is ready to be removed use your index finder and place a small swipe in the wax. If the swipe appears greasy, wait. If the swipe appears clean, time to remove.
Taking a clean good condition MF towel folded with the pile side out, begin removing the wax by using circular motions. Do not apply pressure, the idea is to have applied a very thin layer making removal easier. This will reduce the possibility of micro-marring your paint finish over time. Resist the urge to use more pressure and in stead use more passes if you have a difficult time removing wax.
The conclusion
Using a polisher is an exercise in consistency. Maintaining pad angle and pressure plus the mechanics of pad rotation and movement speeds will help perfect your protection game. With these points maximized coupled with surface prep, your wax will look and perform better.
The following is an list of additional points regarding waxing with a DA polisher.
- Cleanliness is paramount. Abrasives on the car can be pulled into the work zone. Dirt from the bench can be transferred to the paint surface etc. Once on the pad, damage to the paint will happen.
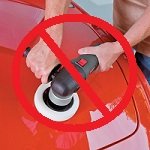
- Do not use the T-handle, you are not grinding, LOL.
- To apply wax, look for a foam flat pad with no cutting ability not a textured or CCS pad (Collapsed Cell Structure). CCS pads are designed to work with paint correction products and are less absorbent compared to flat pads.
- DA polishers can be used to apply Waxes in paste or liquid form and Sealants.
- When polishing, put the polisher cord over your shoulder to keep it from rubbing on the vehicle and scratching the paint.
- Always start and stop polisher with pad in flat contact with the paint to stop product from being thrown or slung by pad spin.
- Use small hand applicators or smaller sized pads to work tight areas, do not try to force a large pad to conform to a tight work area.
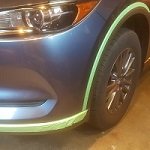
- Mask plastics (especially textured) and do not apply to rubber surfaces (such as window seals and sashes).
- Clean your pads after each job and keep them in a clean & dry location away from abrasives, oils, grease and silicones.
Thank you,
JP
edited for updates
Last edited: